As an affiliate, we earn a commission from qualifying purchases made through links on this site.

Category: Whitetail Deer

  • Planning a Youth Deer Hunt in the Texas Panhandle

    Planning a Youth Deer Hunt in the Texas Panhandle

    A youth deer hunt in the North Zone gets its own weekend, and in 2026 that weekend is October 30 through November 1 — a full week before the general season opens on November 7. That timing is the whole point. For three days the deer have not been shot at, the roads are quiet, and a twelve-year-old is hunting unpressured animals instead of ones that have already learned what a truck door sounds like. Planning around it takes a little more paperwork than planning a regular hunt, and most of the people who miss out miss out on the paperwork, not the deer.

    When the Texas youth deer hunt seasons actually run

    Texas gives youth hunters two separate windows in the North Zone, which covers the entire Panhandle:

    • Early youth-only season: October 30 – November 1, 2026
    • Late youth-only season: January 4 – 17, 2027

    For context, archery-only runs October 3 through November 6, 2026, and the general season runs November 7, 2026 through January 3, 2027. The late youth season picks up the day after the general season closes and runs two full weeks, which makes it the most overlooked opportunity on the Texas deer calendar. By the second week of January the pressure is gone, the rut is over, and deer are back on a predictable food pattern. If your kid has school conflicts in late October, do not treat the season as lost — January is arguably the easier hunt.

    Bag limits and antlerless rules during a youth-only season generally mirror the first two days of that county’s general season, so they vary by county. Confirm yours in the current Outdoor Annual, and cross-check everything against our Texas Panhandle hunting season dates rundown before you commit to a weekend.

    Who counts as a youth, and what they need to carry

    Only hunters 16 years of age or younger may participate in a Texas youth-only season. There is no minimum age in state law, which leaves the judgment where it belongs — with the parent.

    The license to buy is the Youth Hunting License, Type 169. Two things about it are worth knowing. It is inexpensive, and it stays valid for the entire license year even if the hunter turns 17 partway through. A kid who turns 17 in December is still covered through the following August on a license bought in September.

    Hunter education is required in Texas for anyone born on or after September 2, 1971. Hunters under 9 cannot be certified yet, and those under 17 may hunt without certification as long as they are accompanied by a licensed adult who meets the requirement themselves. “Accompanied” means within normal voice and visual contact — not back at the truck. The practical move is to get the kid certified anyway. The online-plus-field course runs a weekend, it is the cheapest insurance there is, and it means a 13-year-old can eventually hunt a stand on their own instead of always sharing yours.

    Finding ground for a youth deer hunt

    This is the part that stops most families, because the Panhandle is overwhelmingly private land. There are three real paths, and the first one is better than its reputation.

    TPWD drawn hunts. The application and permit fees are waived for every participant in the youth-only drawn hunt categories — the youth, and the supervising adult who comes along but does not hunt. That is a genuinely free deer hunt on managed ground, and the draw odds in youth categories are better than in the open categories because far fewer people apply. The special permit categories take applicants aged 8 to 16 with a non-hunting adult 18 or older. National Wildlife Refuge hunts take 9 to 16. There are also youth/adult categories where both the kid and the adult get to hunt. You can apply for up to three areas per category, so apply for three.

    The Annual Public Hunting Permit. At roughly the cost of a tank of diesel, the APH opens up a million-plus acres of wildlife management areas and leased units statewide, including ground in and around the breaks. Supervising adults on public land need their own APH even when the youth’s fees are waived in a drawn hunt. Worth buying regardless of whether you draw anything.

    Private ground. Ask in the spring, not in October. The landowner who will not lease you a November deer weekend will often let a kid shoot a doe on a management tag in January, because by then he is trying to hit a harvest number and you are helping. Offering to help with feral hogs first is the oldest and still the best introduction in this country. A guided hunt through a local outfitter also solves access in one step if your time is worth more than your patience, and several Panhandle outfits run youth-specific weekends at a reduced rate.

    One rule that applies everywhere on public land: a youth under 17 must be under the immediate supervision of a licensed adult at least 18 years old. Under 12, they stay within normal voice distance. Certified hunters 12 to 16 only need the supervising adult present on the area.

    Setting up a sit a kid can actually finish

    Twenty-seven years of putting hunters in Panhandle blinds taught us that a youth hunt fails for one of two reasons, and neither is shooting. Either the kid gets cold, or the kid gets bored. Both are solvable the day before you go.

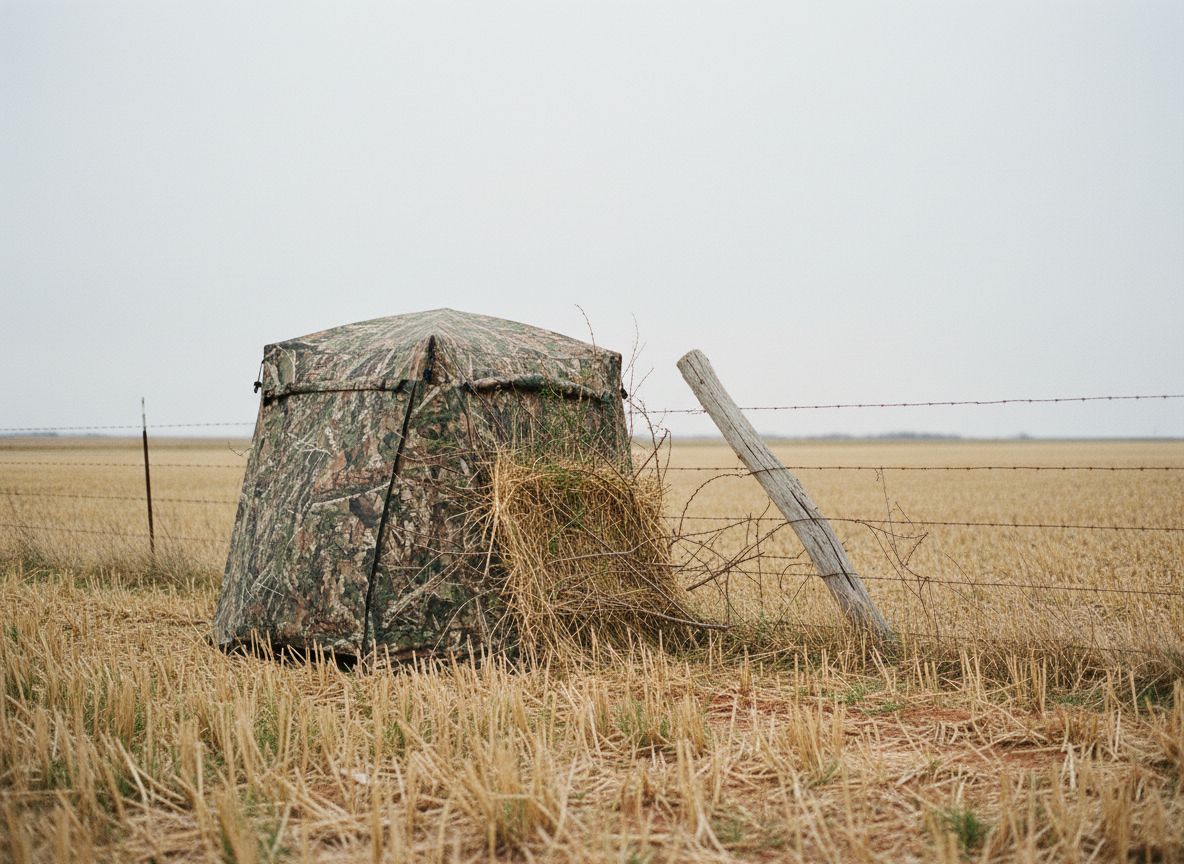
    Hunt from an enclosed blind over a feeder, a food plot, or a field edge, and do not apologize for it. A kid in a box blind can fidget, whisper, eat a sandwich, and warm their hands, and the deer never know. A kid in a tripod on an open Panhandle field edge in a twenty-mile-an-hour north wind is done in forty minutes. Our notes on ground blinds for open country cover what holds up in this wind, which is a narrower list than the catalogs suggest.

    Plan short sits. An evening hunt from four o’clock to dark is two and a half hours, ends with dinner, and leaves everybody wanting to go again. A dark-to-ten-o’clock morning sit in late October cold is how you teach a kid that hunting is something adults make you do. Do mornings in January when the food pattern is reliable and the deer come early.

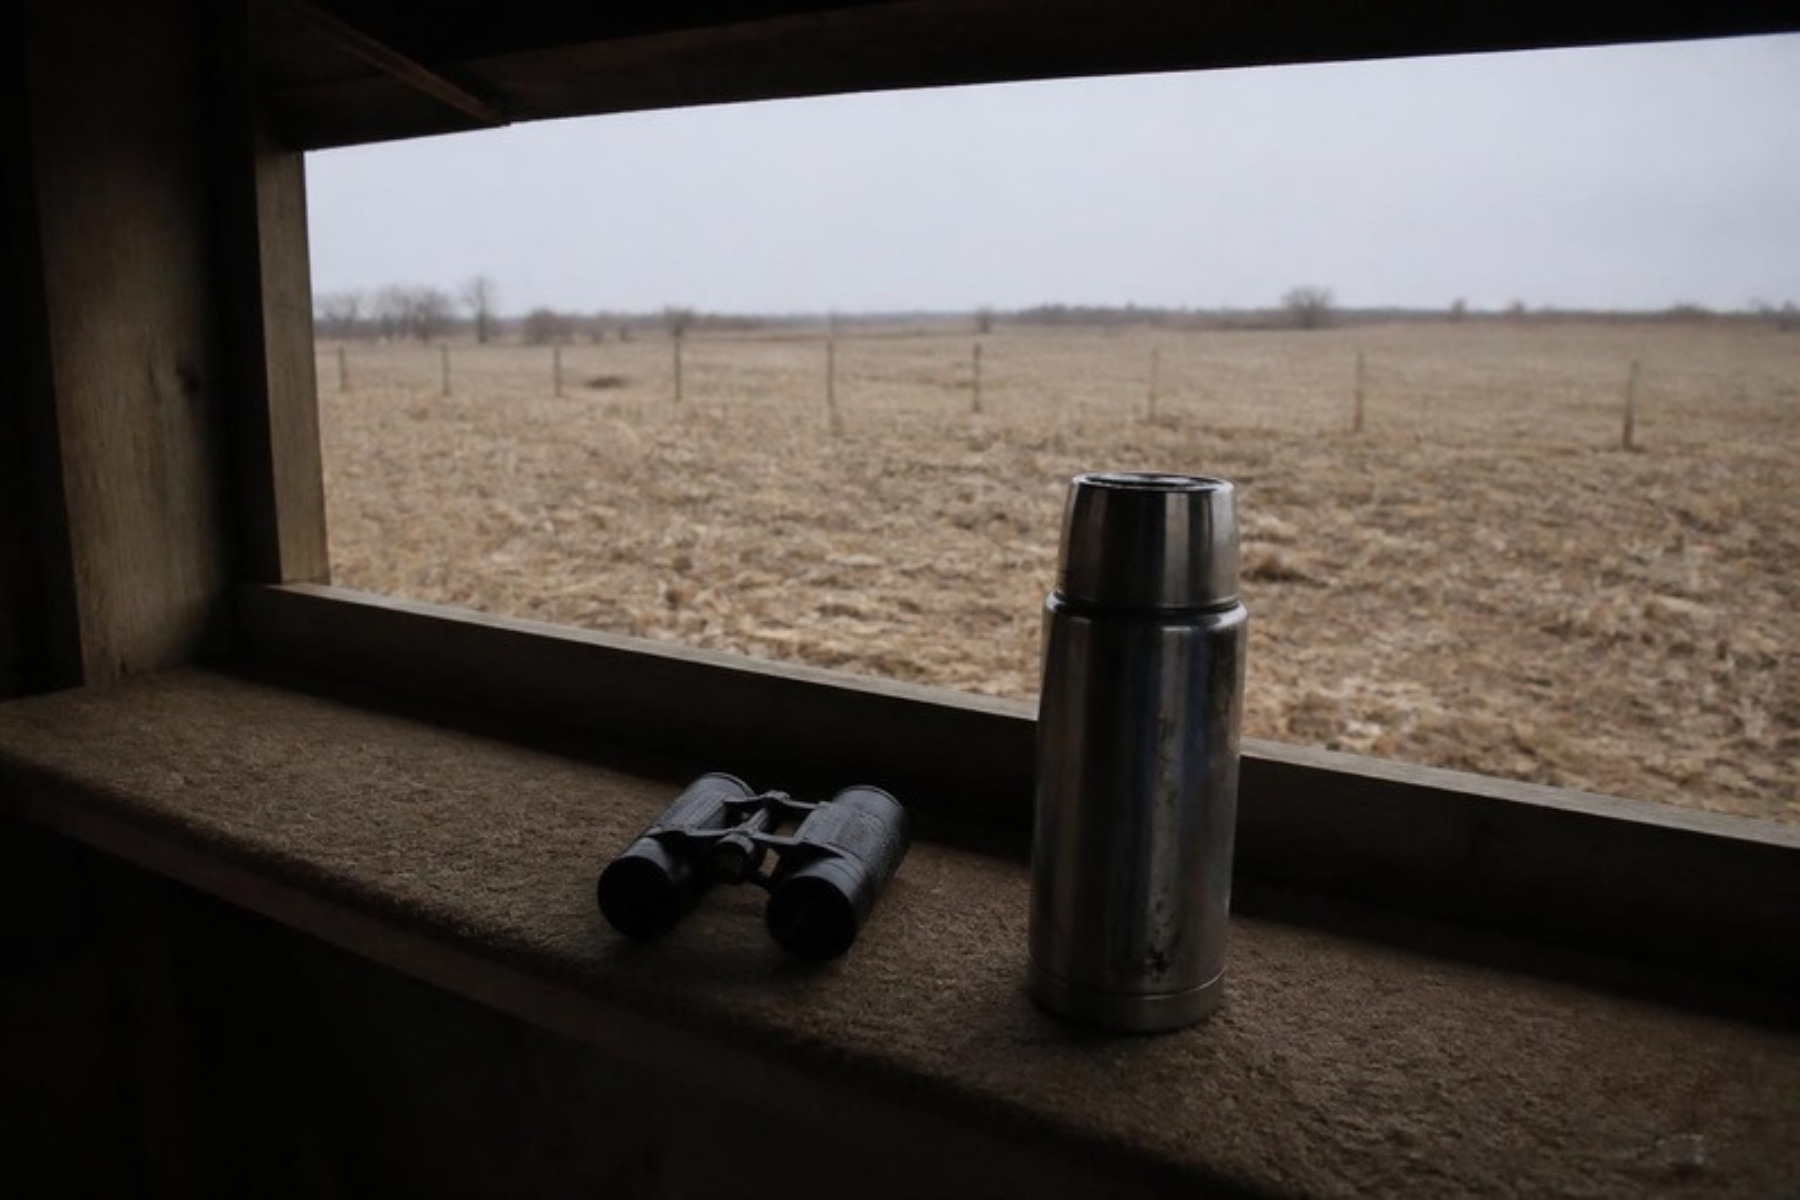
    Give them a job. A kid with their own binoculars watches the field instead of the clock. The Vortex Diamondback HD 8×28 is the honest pick here — it is a real binocular with real glass, light enough for small hands, and 8x is far more forgiving to hold steady than the 10x most adults carry. It will not get outgrown.

    Hearing protection goes in the blind, not in the truck. Adults have been flinching at muzzle blast for years and have stopped noticing; a kid’s first unprotected shot can put a flinch in them that takes two seasons to train out. Electronic muffs let them hear you talk and still cut the shot. Howard Leight Impact Sport muffs are the long-running standard and cheap enough to keep a spare pair in the blind. If the muff is sitting too wide on a small head and pushing the cheek off the stock, Walker’s builds a Razor Compact on a youth-sized cup that solves it — worth looking for at a local sporting goods counter where the kid can try it on.

    Make the shot easy before you ever leave the house

    The single best thing you can do for a young hunter is remove every variable from the shot except the trigger. That means a rest, a known distance, and a lot of practice at that distance.

    Pick the stand site, range the two or three places a deer is likely to stand, and write those numbers on tape inside the blind. Then set a rest the kid can get behind without stretching. A tripod that adjusts under load lets a seated kid find the gun instead of reaching for it — a Primos Trigger Stick, or any shooting tripod with a one-hand height release, is what you want here. The feature that matters is being able to raise or drop the rest without taking the rifle off it, because a deer steps out and the height is always wrong.

    For practice, reactive targets do something a paper bullseye cannot: they show the hit instantly, from the bench, with no walk downrange and no squinting through a spotting scope. Birchwood Casey Shoot-N-C bullseyes are the common ones, and the eight-inch size with repair pasters lets one target absorb a whole afternoon. Instant feedback is what builds a kid’s confidence, and confidence is what keeps them from jerking the trigger on a live deer.

    Set a maximum range and hold to it. A hundred yards is plenty for a first deer, and a kid who has put thirty rounds into a paper plate at a hundred from a rest is better prepared than most adults who sighted in at the range in August and have not shot since. Rifle and scope choices matter enough to deserve their own piece — our guide to the best youth rifle and scope setups for a first deer hunt covers length of pull, caliber, and what to spend the optics budget on.

    After the shot

    Late October in the Panhandle can still run eighty degrees in the afternoon, and a deer down at last light needs to be opened and cooled inside the hour. Decide beforehand how much of that work the kid does. Most twelve-year-olds want to be involved and a few absolutely do not, and both answers are fine — but it goes better when nobody is figuring it out in the dark with a flashlight in their teeth. Our step-by-step field dressing walkthrough is written for exactly these conditions, and the home butchering guide picks up from there if you process your own.

    One last thing worth saying out loud: let them shoot a doe. Holding a new hunter out for a buck in a season that is three days long is how a kid ends up with a tag in their pocket, a long drive home, and the impression that they failed. A doe on the ground on Saturday morning of a youth weekend turns into a kid who wants to go back next year, and that is the only outcome that matters. Apply for the January season too — it is two weeks long, the pressure is gone, and it is the best second chance in Texas.

    More on the species and the country it lives in is on our Whitetail Deer Hunting guide, and the gear that holds up out here is on the Recommended Gear page.
  • Reading Wind and Thermals in Canyon Country

    Reading Wind and Thermals in Canyon Country

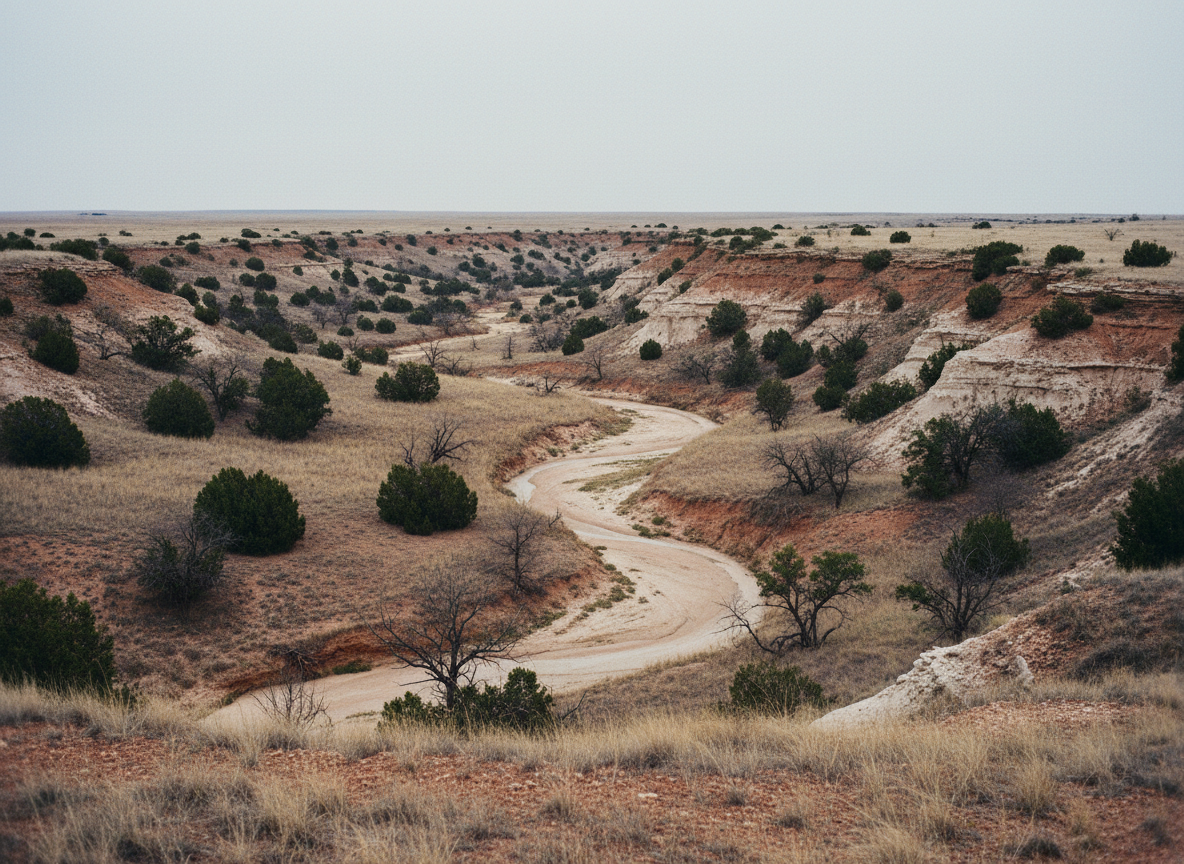
    Wind and thermals are why a hunter can do everything else right in canyon country and still get blown out of a draw at first light. The forecast said south at twelve. The flag on your stand says south at twelve. And the doe feeding two hundred feet below you throws her head up, stares at your tree, and leaves — because the air on that slope is not doing what the air above it is doing. In the Caprock breaks the terrain writes its own weather, and hunters who learn to read it kill deer in places that look unhuntable on a map.

    Wind and Thermals Are Two Different Problems

    Wind is what the weather is doing. Thermals are what the ground is doing. They run on separate schedules and they are frequently in disagreement.

    Thermals are simple physics. Air warms, air rises; air cools, air sinks. When the sun comes over the rim and heats a canyon slope, the air against that slope climbs and carries your scent up with it. When the sun comes off in the evening and the rock gives up its heat, that air turns heavy and pours down the drainage like water. Every canyon, side draw and finger of a wash does this daily, whether or not any wind is blowing.

    In a wheat field on top of the Caprock thermals barely matter — flat ground produces almost none and the prevailing wind owns the field. Drop forty feet off the rim into a draw and the ranking flips.

    The Daily Thermal Cycle in the Breaks

    The cycle is predictable enough to hunt by, in four parts.

    Before daylight, thermals run downhill. The ground has shed heat all night and the cold air has settled into the bottoms. Walk into a draw at four-thirty and everything you smell like goes down the drainage ahead of you, straight into the deer you are trying to reach. It is the most common way hunters ruin a morning out here, and almost nobody accounts for it.

    Thirty to sixty minutes after sunrise, they flip. There is a slack period of a few minutes where the air does not know what it wants, then the slope heats and everything reverses and climbs. East-facing slopes flip earlier; a north-facing slope in a deep canyon may not flip until mid-morning, or at all in late season.

    All day, thermals run uphill — strongest mid-afternoon on a sunny slope. If you are above a bedded deer at midday, your scent is going to him.

    Starting an hour or so before sunset, they flip back down. This is the one that matters most to a bowhunter, because it coincides exactly with the evening movement you were waiting for. A stand that played perfectly at two in the afternoon can be unhuntable at six.

    Once you can read wind and thermals together, there is a practical shortcut: hunt uphill of deer in the morning, downhill of deer in the evening. The thermal is carrying your scent away from them in both cases.

    The Prevailing Wind on Top of the Caprock

    The Panhandle’s default is a south or southwest wind, rarely gentle. Fifteen to twenty-five miles an hour in October is an ordinary day, which has one advantage — a steady hard wind overpowers the thermals and gives you one direction to plan around.

    The exception is the front. When one comes through, the wind swings hard north and climbs, and for a day or two every stand on the place is wrong. Deer move well on a front, and the hunters who already have a north-wind setup picked out are the ones who can use it. Most people own only south-wind stands and sit them anyway.

    Knowing the synoptic wind a day out is the easy part. The National Weather Service office in Amarillo posts hourly speed and direction for Amarillo, Dalhart, Borger, Dumas, Perryton and a string of other Panhandle stations, and a front that swings the wind north is visible well before it arrives. Check it the night before and pick the stand to match. What no forecast tells you is what the air does once it drops off the rim.

    Terrain bends wind too. A hard south wind crossing a canyon rim spills over the edge and rolls, and the pocket just below the rim on the downwind side can be dead calm or blowing back uphill. That eddy is why deer bed under a rim on a windy day, and why a stand sited on the rim itself almost never works.

    When Wind and Thermals Disagree

    Here is the part that costs people deer. When wind and thermals disagree, the air does something that matches neither one.

    Sort it by strength. Wind over about fifteen miles an hour wins nearly everywhere, even in a deep canyon. Under five, thermals win outright. Between five and fifteen it swirls, and nobody can reliably predict it — you have to check.

    A pocket wind checker settles the argument in a second, and it is the cheapest useful thing in a bow pack. Hunter’s Specialties Windicator is unscented talc in a squeeze bottle — one puff and you watch where it goes instead of guessing from what your cheek feels. The important habit is checking it every time the terrain changes shape, not just once when you sit down. A hundred yards along a bench can be a different answer.

    Milkweed floaters do the same job better at distance — they hang and drift a hundred yards and show the whole current rather than the first three feet of it, and you can pick them off fence lines in the fall for nothing. A Kestrel pocket weather meter gives you an exact speed if you want the number, but it reads only the air where you stand and says nothing about the slope below you; the talc is more useful for less money, and Kestrels are generally a dealer or direct-order item anyway.

    Siting a Stand You Can Hunt Twice

    The mistake is picking the spot with the best sign and hoping the wind cooperates. Reverse it. Find the travel route first, then the one approach and setup the air allows, and accept that you can hunt it only on certain days.

    Three things make a canyon setup repeatable. Your scent cone has to spill into dead country — open pasture, a plowed field, the far side of a rim where deer are not traveling. Your access route has to be clean in the direction the thermal is running at the hour you walk in, which usually means a ridge top in the dark rather than a draw bottom. And you want a mirror setup across the drainage for when the front comes.

    Two stands on one funnel, hunted correctly, will outproduce six hunted whenever the mood strikes. Twenty-seven years of guiding hunters through this country made that lesson monotonous: the deer were almost never the problem, the approach was.

    Binoculars let you work this out without walking through it. An opposite rim at gray light tells you in one morning what three weeks of boot leather guesses at. A mid-priced 10×42 like the Vortex Diamondback HD is plenty of glass for canyon distances and holds up to being dragged across caliche, which matters more out here than the last few percent of edge sharpness.

    Stalking With the Thermal Instead of Against It

    Spot-and-stalk is genuinely on the table in the breaks, and the thermal cycle decides the route.

    If you glass a buck bedding on a slope in the morning, do not go straight at him — the mid-morning thermal is climbing that slope and he sits above the only line you would take. Come at him from the side along a bench, or leave him and return in the evening once the air has turned over and you can work down from the top.

    Watch the slack window. In the twenty or thirty minutes a thermal spends changing direction, a slope is as close to scent-neutral as it gets, and that is when a stalk is worth attempting on a deer you otherwise could not reach.

    When You Cannot Win the Wind

    Sometimes the only huntable setup puts your scent where you do not want it. Scent control helps at the margin — a Scent Killer Gold kit covers washing gear and spraying down, and clothes stored outside the house are worth the trouble. None of it beats a deer’s nose, though, and anyone who says otherwise is selling something.

    The better answer is the harder one: do not hunt it. A funnel burned on a bad wind in the first week of October will not produce again until the rut, and sometimes not then. Sit a second-choice spot with clean air, scout a different section, or stay home. A canyon holds your scent in a way open country does not.

    Learn One Drainage

    Pick one canyon and spend a few evenings in it with a bottle of talc and no bow. Puff it at the rim, halfway down, in the bottom, at the head of a side draw, and watch what the air does as the sun comes off the slope. It will not match the forecast and it will not match what you expected — and after three or four evenings you will know how wind and thermals behave in that drainage well enough to hunt it on purpose instead of on hope.

    The terrain reading that goes with this — finding the saddles, benches and draw heads deer actually travel — is covered in archery whitetail tactics for Caprock canyon country, and the pre-season groundwork is in how to pattern a Panhandle whitetail. More on the animals is on the whitetail deer and mule deer guides, and the kit worth carrying is on the Recommended Gear page.

  • How to Butcher a Deer at Home: A Deboning Guide

    How to Butcher a Deer at Home: A Deboning Guide

    Learning to butcher a deer at home is the biggest upgrade most Panhandle hunters can make to their season, and it has little to do with saving money. The nearest processor is often an hour of dirt road away, backed up three weeks deep by the second weekend of November, and what comes back is a box of white paper packages you take on faith. Doing it yourself takes an afternoon, a clean table, and two knives. Not difficult, only unfamiliar the first time.

    Debone It, Don’t Saw It

    The old way was to treat a deer like a beef carcass: hang it, saw across the bone, and come out with round steaks and chops that look like a butcher case. Skip that. Deboning means separating the muscle groups along the seams already in the animal, never touching bone with a blade.

    A bone saw drags marrow and bone dust across every surface it touches, and marrow is where most of the gamey flavor people complain about comes from. Bone-in cuts also eat freezer space. A mature Panhandle buck gives up 45 to 55 pounds of boneless meat — a chest freezer shelf, not a whole freezer.

    There is a regulatory reason to bone it out too. Texas has chronic wasting disease zones, and hunting inside one limits what you can legally haul out; boned meat is the least restricted thing you can carry. The zones shift year to year, so check TPWD’s chronic wasting disease page before you plan around it.

    What You Need to Butcher a Deer at Home

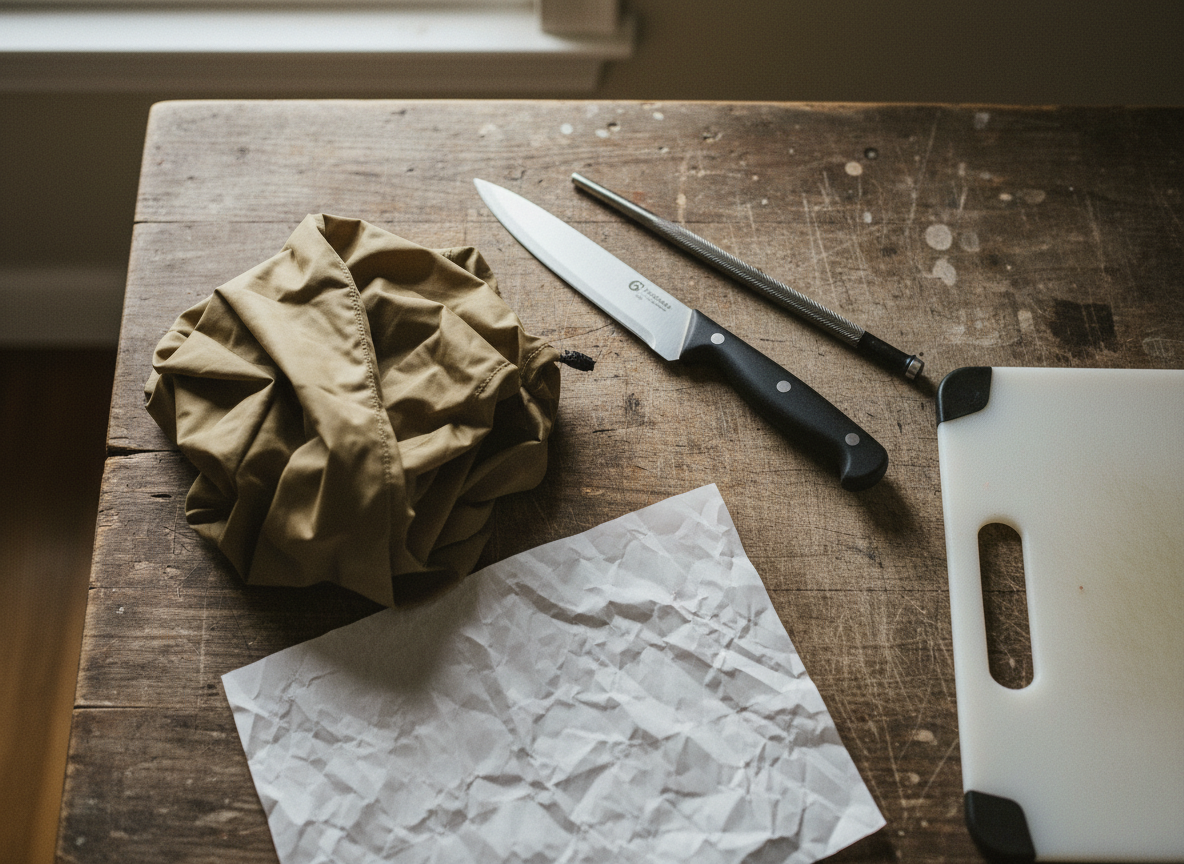
    Everything you need to butcher a deer at home fits on one table, and the list is shorter than the internet suggests.

    • A six-inch flexible boning knife, plus a second blade so you can cut while one gets touched up
    • A steel or ceramic rod — you will want an edge four or five times during one deer
    • A plastic cutting board, or food-grade poly on a folding table
    • Three bowls or trays — steaks, roasts, grind
    • Butcher paper or vacuum bags, and a marker

    The knife is the one place spending matters, and it matters less than people think. A Victorinox Fibrox six-inch flexible boning knife is what most commercial processors hold, costs less than a box of ammunition, and the flex is what lets you ride the curve of a femur instead of fighting it. A stiff hunting knife works, but you will work twice as hard at it.

    If you would rather carry one heavier fixed blade for both the field and the table, the CRKT Soldotna is a thicker-stock drop point with a micarta handle that does not go slick when your hands are wet. Less nimble than a boning knife around a hip joint, and the better knife for everything that happens before the animal gets home.

    Hanging and Aging in Panhandle Weather

    Aging improves venison, but only between about 34 and 40 degrees. Above 45 you are not aging, you are spoiling — a distinction that ruins more Panhandle deer meat than bad shooting does.

    Archery opens here in the first days of October with highs still in the nineties, so hanging is off the table — quarter it and get it on ice the same evening. Even by the November opener, a nighttime low of 34 does you no good if the barn hits 65 by two in the afternoon.

    The answer in this country is a cooler, not a rafter. Quarter it, bag the quarters, and pack them with the drain cracked so meltwater runs out instead of pooling. Four to seven days gives you everything hanging would, with none of the weather risk.

    Size it honestly: a quartered whole deer will not fit in a 45-quart box with enough ice left to matter, so plan on one big cooler or two medium. If you intend to butcher a deer at home every season, buy the big one once. The RTIC 52 QT Ultra-Light is the easier one to live with — roughly a third lighter than a rotomolded cooler, which you notice lifting a full one into a truck bed alone.

    The Yeti Tundra 65 is the opposite trade — heavy rotomolded construction that holds ice longer than anything else sitting in a hot shed for a week. Yeti skips the fifty-quart range in the Tundra line entirely, going 45 then 65, and for a whole deer the 65 is the one that works.

    Keep the quarters in breathable bags, not plastic, while they chill. Reusable ripstop game bags let the surface dry and crust slightly, which is what you want — meat sealed wet in a trash bag sours at the surface even on ice.

    Taking the Deer Apart

    Order matters when you butcher a deer: take the best cuts off first, while your edge is fresh and your hands are clean. This assumes the animal is already gutted, skinned, and chilled — if not, the sequence is in how to field dress a whitetail deer.

    Backstraps first. They sit in the trough either side of the spine, outside the ribs. Run the knife tip along the vertebrae, then along the outside edge where loin meets ribs, and lift the strap out whole — a cylinder two to three feet long. Start here, because backstrap is the cut you least want to ruin.

    Tenderloins. Inside the body cavity, under the spine just forward of the pelvis. Two small soft muscles, the best meat on the animal, and they dry out fast — pull them the same day.

    Front shoulders. Lift the leg away and cut straight down into the gap. Nothing but muscle and a thin sheet of connective tissue holds a deer’s shoulder to its ribs — no ball-and-socket joint. Keep cutting toward the spine and the shoulder peels off.

    Hindquarters. The only real joint work. Cut along the inside of the leg to the ball joint at the hip, then rotate the leg outward hard. The joint pops and you finish with the knife. 15 to 20 pounds each on a good deer.

    Neck, ribs, flanks. Strip it all for grind. Neck meat is excellent and routinely thrown away — the most wasted cut on a deer.

    Breaking Down a Hindquarter

    The first time you butcher a deer, the hindquarter is where your nerve goes, and it is the simplest part once you see what you are looking at. A hind leg is four big muscles stuck together with silverskin, and they come apart with your fingers nearly as much as with the blade. Lay it flat and find the seams — thin white lines between muscle groups. Work a thumb in and pull. They separate cleanly, and from there you are only trimming each free of the femur.

    What you get: top round and sirloin tip, good enough for steaks or a roast; bottom round, better braised or ground; and the eye of round, a small football-shaped muscle that is excellent whole. Trim every bit of silverskin off anything headed for a grill — it does not render and it does not chew, and it is the other half of why people think venison is tough. Front shoulders carry too much connective tissue for steaks; bone them out for grind, or braise one whole.

    Grinding and Wrapping

    Butcher a deer at home and you will finish with 20 to 30 pounds of trim. Get it nearly frozen before it goes near a grinder — warm meat smears instead of cutting, and smeared meat turns to paste.

    Venison carries almost no intramuscular fat, so it grinds dry. Most people add beef fat or pork at 10 to 20 percent; a grocery butcher will usually sell you suet cheap if you ask. Grind it pure if you would rather, and plan on chili, enchiladas, and anything else with moisture in the pan.

    An electric grinder turns a four-hour job into one hour. The STX Turboforce 3000 is the usual starting point for a household doing one or two deer a year — a #12 head, multiple plates, and enough motor to pull coarse-ground shoulder without stalling.

    Vacuum sealing beats butcher paper on anything you keep past six months, which is most of a deer. Paper-wrapped venison burns in four to six months; vacuum-sealed holds a year or better. The FoodSaver FM2100 is the entry-level machine most hunters land on. Pre-freeze ground meat into flat one-pound bricks before you seal it, or the vacuum pulls the mince through the bag seal and ruins it.

    Label every package with the cut and the date. You will not remember in February.

    Mistakes That Cost You the Meat

    Most people who butcher a deer badly did not make a bad cut. They made one of a handful of ordinary mistakes somewhere between the field and the freezer, and every one is easy to avoid once somebody tells you.

    Do not hose it off. Rinsing a quarter with a garden hose feels like cleaning and does the opposite, driving surface bacteria into the tissue and waterlogging the outside so it never crusts over. If something needs to come off, trim it or wipe it with a damp rag.

    Do not let it sit in meltwater. This is what people get wrong with the cooler method. Ice melts, water pools, and quarters sitting in it come out pale, slick and washed-out. Crack the drain plug and leave it cracked, prop the low end up, check it daily. Meat on ice is right; meat in water is not.

    Do not leave the hide on overnight in warm weather. A hide is insulation and it works as well on a dead deer as a live one. A gutted deer with the hide still on holds body heat in the hindquarters for hours after the air has cooled off. Skin it the same evening.

    Keep hair off the cut surfaces. Much of what people call gamey is hair and hide contact, not the animal — deer hair is hollow and greasy and the smell transfers immediately. Pull the hide down and away as you skin, and pick off what lands on meat.

    Do not save the fat. Beef fat is an asset; deer fat is not. It is waxy, it coats your mouth, it carries the strongest flavors in the animal, and it goes rancid faster than the meat. Trim it and throw it out — which is exactly why you add beef or pork fat back at the grinder.

    Do not feed sinew into the grinder. It will not cut. It wraps the auger, blinds the plate, and turns the next few pounds to paste. Trim as you go instead of clearing a jammed head.

    Do not season before freezing, and do not refreeze what you thaw. Salt pulls moisture out and speeds rancidity in whatever fat you added, so season at the skillet instead.

    Start With One Hindquarter

    Nobody needs to butcher a deer perfectly the first time. Twenty-seven years of guiding hunters through this country turned up plenty of men who shot well and had never once seen the inside of their own deer.

    If the whole animal feels like too much, take the backstraps and one hindquarter and send the rest to the processor. You will learn the seams on that one leg, and next season you will butcher a deer start to finish. A few simple ground venison recipes will go through a surprising amount of the grind. More on the animals is on the whitetail deer and mule deer guides, and the rest of the kit is on the Recommended Gear page.

  • Best Ground Blinds for Open Country Deer Hunting

    Best Ground Blinds for Open Country Deer Hunting

    A blind that disappears in an East Texas thicket sits out on the Panhandle plains like a parked car. That’s the whole problem with choosing ground blinds for open country — there’s no backdrop to break up the outline, the wind never quits, and deer out here see a long way because they’ve always had to. Most blind advice is written for timber. Here’s what actually matters when the nearest cover is a fence line and a quarter section of milo stubble.

    Why Open Country Breaks Most Blind Advice

    Three things are different here, and each one changes what you should buy.

    There’s nothing behind you. In timber, a blind sits against a wall of trunks and brush and vanishes. On a wheat field edge, a blind is a dark box against open sky. Camo pattern barely matters at that point — what matters is height, shape, and whether you’ve done anything to tie it into something.

    The wind is a structural problem, not a comfort problem. Sustained twenty to thirty is an ordinary day out here, and spring and late fall will hand you gusts well past that. A hub blind that isn’t anchored properly does not flap — it leaves. People lose blinds every year, and the ones that don’t blow away still rattle and pop all morning, which is its own kind of failure.

    Deer see you from distances that don’t apply in the woods. A whitetail crossing a plowed section can look at your setup from four hundred yards and decide about it before he ever gets in range. That means a blind has to be in place long enough to become furniture, and it means you need to see him coming without opening a window.

    What to Look for in Ground Blinds for Open Country

    Low profile beats roomy. Height is what gets a blind noticed on flat ground. A blind you can sit up straight in with a foot of headroom to spare is a blind that stands a foot taller than it needs to. Manufacturers sell interior height as a feature because it’s easy to advertise. Out here it’s a liability.

    See-through walls are worth more here than anywhere else. The technology that lets you look out through the fabric from inside while the outside stays opaque solves the specific open-country problem of watching a deer come across a half mile of nothing. You track him the whole way without cracking a window, which is exactly the movement that gets you caught on a bright, still morning.

    Count the real stake points. Not the little fabric tabs — look for reinforced loops at every corner and mid-panel, plus tie-off points up high for guy lines. This is the spec that separates a blind that survives three seasons out here from one that doesn’t survive one.

    A dark interior matters more than the outside camo. Black interior coating kills the silhouette of a hunter moving inside. On a sunny afternoon with the sun behind the blind, a light interior turns you into a shadow puppet.

    Judge fabric by weight, not by the word “silent.” Heavier fabric is quieter in wind, holds its shape, and lasts against UV. Panhandle sun destroys thin blind fabric in two or three seasons regardless of what the tag says.

    Blinds Worth Considering

    The Rhino Blinds R180 is the one that fits this country best, and the reason is the see-through walls. From inside you get roughly 180 degrees of view straight through the fabric — the entire front of the blind — while the outside stays opaque. On a wheat field or a CRP edge where you can see for a long way, that’s not a gimmick. It’s the difference between tracking a deer the whole way across open ground and getting surprised at thirty yards with a bow in your lap. It’s sized for three, which in practice means two adults with room to draw. The trade is bulk and weight: this is a blind you set in one spot for the season, not one you pack around.

    Primos pioneered this idea with the Double Bull SurroundView line, and their 360-degree version is still the most complete execution of it — see-through on all four walls instead of just the front. Amazon stock on those comes and goes, so there’s nothing dependable to link here; they’re carried by Bass Pro, Cabela’s, and Primos direct, and worth pricing against the Rhino if you want the full wrap-around view.

    For a blind you actually carry, the Ameristep Caretaker Kick Out goes the other direction and does it well. It’s a one- or two-person hub blind with a genuinely low profile, it packs small, and it costs a fraction of the see-through blinds. The low silhouette is the point — tucked into a fence corner or a terrace with brush piled against it, it’s hard to pick out. Two people in it with a bow is tight, and that’s the honest trade for the size and price.

    If you’re setting up permanently on ground you control, insulated fiberglass box blinds — Redneck Blinds is the name most people know — are a different category of product entirely. Weatherproof, genuinely quiet, and they last twenty years. They don’t sell through Amazon, so there’s nothing to link here; they go direct and through dealers, and they’re worth pricing out if you’re putting something on a place you own rather than hauling a blind in and out.

    Anchoring It Against Panhandle Wind

    This is where most open-country blind setups fail, and the stakes that came in the bag are why. Those six-inch wire pins are meant for lawn use. In sandy Panhandle soil they pull out in a twenty-mile-an-hour gust, and in hard caliche they bend before they seat.

    A proper anchor kit fixes it. A blind stake kit with ratchet tie-downs gives you heavy metal stakes plus straps to run from the upper tie-off points down to ground anchors, which is the part that actually keeps a blind from lifting. Cheap insurance against replacing a blind.

    Three more things worth doing. Drive a T-post at the two windward corners and strap the blind frame to them. Put weight inside on the floor — a couple of sandbags or a five-gallon bucket of dirt does more than people expect. And site the blind where terrain is already helping: the lee side of a terrace, a fence corner with a cedar in it, the down-wind side of an old windmill or a round bale. A blind in a hollow outlasts a blind on a rise every time.

    Brush It In, and Set It Early

    A blind set two weeks before you hunt it is a different blind than one set that morning. Deer in open country pay close attention to new objects and then stop caring once nothing bad happens around them. Two to three weeks is the number worth aiming for.

    Brushing in is not decoration. Pile cut mesquite, sunflower stalks, kochia, whatever grows on that ground, against the windward and field-facing sides until the blind’s straight edges are broken up. The goal isn’t to hide the blind — you can’t, out there — it’s to make the shape stop reading as a box. Cut brush from somewhere else on the property, not from the fifty yards around your setup, or you’ll open up the very cover that made the spot good.

    When a Treestand Still Wins

    Open country doesn’t mean treeless. The creek bottoms, the cottonwood lines along the draws, and the shelterbelts planted around old homesteads all hold trees big enough to hunt, and those are exactly the corridors deer use to cross open ground.

    For a stand you’ll sit all day in cold weather, the Millennium M100U Ultralite is the one people stop complaining about. The sling seat is the reason — it’s comfortable enough that you stay put through the midday hours when a pressured Panhandle buck is actually moving.

    If you’d rather move than commit, the Hawk Helium Kickback XL is light enough to pack in and hang the same morning, which suits hunting a cottonwood line where the right tree depends on which way the wind is blowing that day. Pair it with a set of aluminum climbing sticks rather than fighting a cottonwood’s bark with a climber.

    A harness is not optional and not a place to save money. The Muddy Magnum Elite is the straightforward pick — padded, quick-release buckles, and comfortable enough that people actually wear it, which is the only spec that matters. Hunter Safety System builds the harnesses most hunters know by name and they’re worth a look too, but their Amazon listings come and go by size, so buy those direct or through a dealer rather than hunting for a live listing.

    Whichever harness you buy, run a lifeline from the ground to above your stand and stay clipped to it the whole way up and down. This is the part people skip. Nearly every treestand fall happens to somebody who owned a harness and wasn’t attached to anything yet — on the sticks, or stepping across onto the platform. The harness only works if you’re tied to the tree while you’re climbing, not just once you sit down.

    Saddle hunting deserves a mention because it solves the crooked-cottonwood problem better than any stand does. Tethrd and Lone Wolf Custom Gear are the two names worth researching, and neither sells through Amazon, so there’s nothing to link. If you hunt scattered trees and move often, it’s the system to look at.

    Tripods: The Honest Answer for Flat Ground

    Where there’s genuinely no tree — the middle of a section, a playa edge, a milo field with sunflowers grown up over your head — a tripod does what neither a blind nor a stand can. Ten or twelve feet of elevation gets your sightlines above standing crop and puts your scent stream above a deer’s nose on flat ground.

    The Muddy Horizon Tripod covers the usual version of this: a swivel seat, a shooting rail, and a footprint you can move with two people and a truck. Brush the legs and wrap the base in burlap or camo netting, because an unwrapped tripod with a hunter sitting in the open on it is the most visible thing in that field.

    The honest limitation: a tripod in thirty-mile-an-hour wind is a bad place to be. It moves, it’s cold, and there’s nothing between you and it. On the windiest days a staked-down ground blind is the better tool, which is a real argument for owning both.

    The Small Things That Decide Whether You Sit Still

    A blind fails on comfort more often than on concealment. Four hours in a folding camp chair that creaks every time you shift and you’ll start moving, and movement is what deer catch.

    A proper silent swivel blind chair is the single upgrade most blind hunters notice immediately. Being able to turn toward a window without picking a chair up off the ground is worth more than another layer of camo.

    Two more cheap fixes. Put a piece of old carpet or a rubber mat on the floor so boots on dirt and gravel stop making noise. And wear dark clothing inside a blind, not camo — camo breaks up against brush, but inside a dark box, black is what makes you disappear in the window openings.

    If You Only Buy One

    For most people hunting open Panhandle ground, a low-profile hub blind plus a real anchor kit, set three weeks early and brushed in properly, will kill more deer than a better blind set the morning of. The setup matters more than the product. Get it in the ground, leave it alone, and let the deer stop noticing it. More on the species and the country is on the whitetail deer and mule deer guides, and the rest of what we recommend is on the Recommended Gear page.

  • Archery Whitetail Tactics for Caprock Canyon Country

    Archery Whitetail Tactics for Caprock Canyon Country

    Most archery whitetail tactics that work in East Texas pine or Hill Country cedar fall apart the first morning you try them in the Caprock breaks. A buck can bed on a shaded slope three hundred feet below you, feed in wheat a half mile out on the flat, and never once walk through the kind of tight timber funnel a bowhunter is taught to look for. The country is open where you want cover and broken where you want sightlines. Getting inside forty yards of a mature deer in it takes a different approach than the one in the magazines.

    What the Caprock Actually Looks Like to a Bowhunter

    The Caprock Escarpment is the line where the flat High Plains break off and drop onto the Rolling Plains below. In some places it’s a gentle step down you’d drive across without noticing. In Palo Duro and Tule Canyon it’s several hundred feet of red rock and juniper, with side canyons forking off the main drainage like veins off an artery. The Canadian River breaks up north and the Red River breaks to the east do the same thing on a smaller scale.

    That terrain sorts itself into three layers, and deer use all three in a single day.

    On top is farm ground — wheat, milo, cotton, and shallow playa basins that hold water for a while after a rain. Down in the breaks are redberry juniper pockets, shinnery oak, mesquite, and sandy draws with enough shade to run twenty degrees cooler than the open flat at two in the afternoon. In the bottoms there’s hackberry, cottonwood, and whatever water hasn’t gone dry.

    Deer bed in the breaks, feed on top, and water somewhere in between. The fact that those three things sit in three separate places is the best thing a bowhunter has going out here. Flat country gives a deer a hundred ways to get from bed to food. The breaks give him four.

    Archery Whitetail Tactics That Work in Broken Country

    The single most useful thing to understand is that deer travel the contour, not the fall line. A whitetail leaving a bed on a canyon slope does not climb straight up the steepest pitch to reach the wheat field. He works sideways along a bench until he finds the place where the grade eases, then walks up through that. Those easings are where you hunt.

    Three features produce them reliably.

    The head of a draw. Where a side canyon pinches out and dies into the flat, the walls come together and the slope flattens. Every deer using that draw funnels through the last fifty yards of it. Find the head of a draw with fresh sign in the bottom and you’ve found the best stand site in that section.

    Saddles on a ridge finger. The fingers of land between side canyons usually have one low spot where deer cross rather than walking all the way out to the point. They’re obvious from the opposite rim and nearly invisible when you’re standing on them, which is why most hunters miss them.

    Benches. A flat shelf partway down a slope is a deer highway and a bedding area at the same time. Deer walk the length of it because it’s the only easy footing between the rim and the bottom. Hunt the downwind end.

    Twenty-seven years of guiding hunters through this country taught the same lesson over and over: the man who hunted the terrain out-killed the man who hunted the food, every season, without exception. Food moves with the crop rotation. A saddle is in the same place it was ten years ago.

    Spot-and-Stalk Is Actually on the Table Here

    This is the part that surprises hunters coming from timber. In the breaks you can glass whitetail the way westerners glass mule deer, because you have elevation and you can see across.

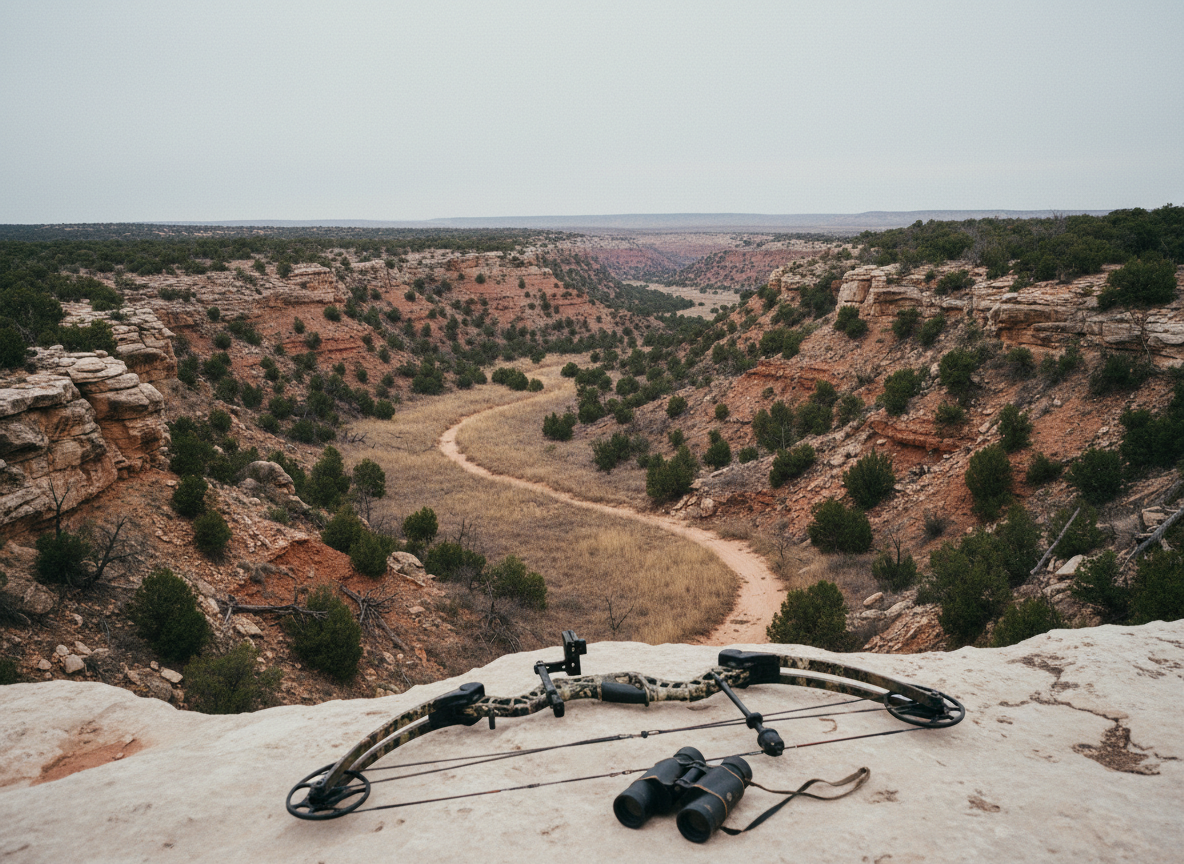
    Sit the rim at gray light with binoculars and watch the opposite slope. Deer coming off the wheat drop into the breaks in the first half hour of daylight, and if you’re patient you’ll watch one bed. Mark the spot against a landmark you can find again — a dead juniper, a caliche slide, a lone yucca. Then leave, swing wide, and come in on him from above when the thermals settle.

    Be honest with yourself about the odds. Most stalks end with a deer standing up at eighty yards and leaving. The footing is loose shale and caliche that rolls, and dry juniper duff is loud. But a stalk that fails costs you a morning, not a season, and it beats sitting a bad stand in the wrong wind.

    A pocket wind checker earns its two dollars here more than any other piece of gear. Canyon air does whatever the terrain tells it to, and a puff of powder will show you a swirl that your face never felt. Hunter’s Specialties Windicator is the standard one — unscented talc in a squeeze bottle that fits a shirt pocket. Check it every time the terrain changes shape, not just when you set up.

    Setting Up Where There Is No Perfect Tree

    Nobody warns you about this until you’re standing in a draw with a stand on your back and nothing to hang it on. Redberry juniper is short, bushy, and multi-trunked. Hackberry is brittle. Mesquite is worse. Cottonwood is big enough but only grows in the bottoms, which is often not where the deer are.

    Two things make this workable.

    First, hang low. Terrain is already giving you the elevation that a stand gives a timber hunter. If you’re set up on the upslope side of a bench, a deer walking that bench is below your feet at ten or twelve feet. Chasing twenty feet in a tree that won’t hold it is how people get hurt for no gain.

    Second, quit looking for a tree and build a ground setup instead. A cedar pocket with the middle cut out of it is the best natural blind in this country — dark inside, rooted in place, and it already smells like everything else on that slope. Cut from the back, leave the silhouette of the outside intact, and clear the floor down to dirt so you’re not standing on crunch.

    A folding saw does most of that work. The Corona RazorTOOTH 10-inch cuts juniper faster than a saw that size has any right to, and it folds into a pack pocket. Pruning shears handle the shinnery.

    Scout Hard Without Burning the Place Down

    A canyon holds scent and sound in a way open country doesn’t. Walk a draw bottom at dawn to check a camera and you’ve told every deer on that slope exactly where you were and when. The breaks punish repeat intrusion harder than flat ground does.

    Cellular cameras are the honest fix. The Tactacam Reveal X 3.0 hunts on multi-carrier LTE, which matters when half the Panhandle has one bar of one network and nothing else. Hang it on the head of a draw or over a water source, then leave that canyon alone for a month and read the pictures from your truck.

    When you do have to go in on foot, go at midday, go once, and take care of everything in that trip. The groundwork for all of this — reading sign and figuring out where deer are headed before the season opens — is covered in more detail in how to pattern a Panhandle whitetail before archery season.

    Early October Heat Is the Real Enemy

    Archery season opens while it’s still summer out here. Ninety degrees in the first week is normal, and it changes two things.

    Deer movement compresses into the last twenty minutes of shooting light and the first ten of morning. Evening sits over water or a field edge beat morning sits badly in the early season, which is the reverse of what most hunters default to. And a deer that beds in a shaded juniper pocket at eight in the morning is not getting up again until the sun is off that slope.

    The other thing heat changes is what happens after the shot. A deer down at seven in the evening with the air still at eighty-five degrees needs to be opened up and cooled within the hour, not after a leisurely walk back to the truck for a light. Carry what you need to do it on the spot — the step-by-step is in how to field dress a whitetail deer. Losing a good buck to spoilage in the first week of October is an entirely avoidable mistake and it happens every year.

    Getting Access to Canyon Country

    Almost all of this ground is private, which is the honest answer and also not the end of the conversation.

    The Annual Public Hunting Permit from Texas Parks and Wildlife is the cheapest real access in the state and it covers wildlife management areas in and around the breaks. Separately, the TPWD public hunt drawing puts archery hunters on WMA and state park units that never see general pressure, and the odds on archery-only categories are better than people assume because fewer hunters apply. Both are worth the application fee even in a year you don’t draw.

    For private ground, the approach that works is the unglamorous one. Knock in the spring, not in October. Ask about hogs first. Landowners along the breaks deal with feral hog damage constantly, and a hunter who shows up in March offering to help with pigs is a different proposition than one who shows up the week before opening day asking about deer. A guided hunt through a local outfitter also solves access in one step if your time is worth more than your patience. Season dates and unit specifics are worth confirming against the current Texas Panhandle hunting season dates before you plan around anything.

    Where to Start

    If you have one section of breaks to learn and limited time, spend the first morning on the rim with binoculars instead of in a stand. Find the heads of the draws and the saddles on the fingers, and watch where deer actually cross. You’ll learn more in three hours of glassing than in three weeks of guessing, and you’ll pick a stand site you can hunt for the next ten seasons. More on the species itself is on the whitetail deer guide, and the gear worth carrying is on the Recommended Gear page.
  • Easy Ground Venison Recipes for Beginners

    Easy Ground Venison Recipes for Beginners

    A Panhandle whitetail yields somewhere around 40 to 60 pounds of usable meat, and once the backstraps and tenderloins are set aside, a good share of the rest comes home as ground. That’s how people end up in February with a freezer full of one-pound packages and no real plan for them. These easy ground venison recipes are the three we’d point a first-time deer owner toward, and they all come back to the same underlying fact about the meat.

    Why Ground Venison Cooks Differently Than Beef

    Venison is lean in a way beef isn’t. Ground beef runs 15 to 20 percent fat. Straight ground venison runs closer to two or three. Every complaint people have about wild game — dry, crumbly, livery, tough — traces back to that one number, and so does the fix.

    Add fat at the grind. Pork fat is the standard and the best-tasting option, at roughly one pound of fat to four pounds of venison, which lands you near an 80/20 blend. Beef suet works. Bacon ends work and add smoke. If your deer is already ground plain, you can still mix rendered fat or finely ground bacon into the thawed meat before you cook it — it’s not as good as doing it at the grinder, but it’s a lot better than nothing.

    If you’re processing your own deer, doing the grinding yourself is where you get control over that ratio. An STX Turboforce 3000 handles a whole deer in an evening and lets you blend fat in as you go instead of accepting whatever a processor decided.

    The second half of the fix is heat. Lean meat goes from done to ruined in under a minute. Pull ground venison earlier than feels right.

    Three Easy Ground Venison Recipes to Start With

    Venison Smash Burgers

    Smashing is the right technique for venison specifically, because the whole point is a hard sear and a short cook. A thick venison patty cooked slowly is how you get a hockey puck.

    Start with a pound of ground venison blended to roughly 80/20 with pork fat or ground chuck. Salt and pepper only — don’t work seasoning through the meat, which makes the texture springy. Divide into four loose balls and don’t compact them.

    Get a 12-inch cast iron skillet hot enough that a drop of water skates across it. Lay a ball down, smash it flat with a spatula for about ten seconds, salt the top, and leave it alone for roughly ninety seconds until the edges go brown and lacy. Flip once, add cheese, and pull it off after another forty-five seconds or so. Two thin patties per bun beats one thick one every time.

    Skillet Venison and Peppers

    This is the weeknight one — one pan, twenty-five minutes, and it goes into tortillas, over rice, or onto a baked potato.

    Brown a pound of ground venison in a tablespoon of bacon grease or oil, breaking it up but not stirring constantly — you want some of it to actually sear. Pull the meat out when it’s just past pink. In the same pan, cook a diced onion and two diced bell peppers until they soften and pick up some color, six or seven minutes. Add three cloves of minced garlic, a tablespoon of cumin, two teaspoons of chili powder, and a teaspoon of smoked paprika, and let it bloom for thirty seconds. Return the meat, add a half cup of beef broth and a tablespoon of tomato paste, and simmer until it’s barely wet, about five minutes. Salt to taste and finish with lime and cilantro.

    Pulling the meat out while the vegetables cook is the step that matters. Leave it in and it sits in vegetable moisture for ten minutes and goes gray and grainy.

    Venison Breakfast Sausage Patties

    Breakfast sausage is the most forgiving thing you can do with ground venison, because the seasoning is doing real work and the fat ratio is higher by design.

    To two pounds of ground venison, add a half pound of ground pork or pork fat. Mix in two teaspoons of kosher salt, two teaspoons of rubbed sage, a teaspoon each of black pepper and brown sugar, a half teaspoon of dried thyme, and a half teaspoon of red pepper flakes. Mix with your hands just until combined. Let it sit covered in the refrigerator overnight if you can — the sage needs time to spread through the meat, and same-day sausage tastes noticeably flatter.

    Form into patties a little thinner than you think and cook over medium in cast iron, about three minutes a side. Pull them at 160°F internal. This is the one recipe here where a fast instant-read thermometer genuinely earns its keep, because pork in the mix means you want a real number rather than a guess, and thirty seconds past that number is a dry patty.

    These freeze well raw with parchment between the patties, which makes a deer worth of sausage a genuinely useful thing to have.

    Where to Go After These

    Once those three are comfortable, the next step is anything braised — venison and beans, a meat sauce that simmers for two hours, chili. Braising is the other way around the lean-meat problem: instead of cooking fast to keep moisture in, you cook long and low in liquid so the meat has something to hold onto. A 6-quart enameled dutch oven covers that whole category and holds a full pot of chili for a deer camp.

    Storing What You Don’t Cook

    Ground meat has more surface area than whole cuts, so it takes on freezer burn faster than anything else in the freezer. Package in one-pound portions — that’s the unit nearly every recipe calls for — and get the air out.

    A vacuum sealer is the difference between venison that’s still good next September and venison you throw out in June. Label every package with the date and the cut. In a freezer holding two deer, nobody remembers which bag is which by March.

    The Part That Happens Before the Kitchen

    Most venison that tastes strong didn’t get that way on the stove. It got that way in the field. A deer that sat warm for three hours in 80-degree September weather is going to taste like something no recipe fixes, and that’s the single most common reason people decide they don’t like venison.

    Cooling the meat fast is the whole ballgame, and it starts within minutes of the animal going down — we walked through that in detail in how to field dress a whitetail. Get that part right and these recipes will do what they’re supposed to.

    Whether the ground in your freezer came off a whitetail or a mule deer, it cooks the same way. Mule deer tends to run slightly coarser and a touch stronger in flavor, which the sausage seasoning handles well.

    Two Habits Worth Keeping

    Add fat, and stop cooking sooner than feels right. Nearly everything people dislike about ground venison comes from skipping one or the other. Get those two habits in place and the recipes mostly take care of themselves.

  • Best Compound Bows and Broadheads for Texas Whitetail

    Best Compound Bows and Broadheads for Texas Whitetail

    Bowhunting the Panhandle isn’t timber hunting with a different weapon. Trees are scarce enough that a lot of hunters run ground blinds instead of stands, wind is a constant instead of an occasional problem, and the deer you’re drawing back on tend to run heavy-bodied and thick-shouldered. None of that changes what a compound bow does, but it changes which setups are worth buying. Here’s what actually holds up on this ground — the compound bows and broadheads worth trusting for Texas whitetail, real market availability included.

    Compound bows and broadheads staged together on a tailgate before Texas whitetail season begins.
    A compound bow and a few broadhead options staged on the tailgate — matching the bow to the broadhead is worth as much thought as picking the bow itself.

    What Panhandle Conditions Ask of a Bow

    Three things matter more here than they would in thick Eastern timber. First, a flatter, faster arrow forgives the yardage-guessing that comes with open-country shots — even with a good rangefinder, a moving deer at 40 yards leaves less room for error than one at 20. Second, a shorter axle-to-axle length matters if you’re hunting a ground blind, where a long bow gets awkward to draw through a window. Third, wind changes a bowhunt in ways it doesn’t change a rifle hunt — not the arrow’s flight so much as your ability to sit still and draw undetected when brush is already moving on its own.

    A quick note before the picks below: the top-tier bow brands sell through authorized pro shops only, not through Amazon, the same way Amazon doesn’t sell firearms. We’re not going to pretend otherwise or link you to a search page dressed up as a product page. Where we can’t link a specific bow, we’ll still tell you straight whether it’s worth your money — that’s worth more than a link that doesn’t go anywhere real.

    Best Overall: Hoyt Alpha AX-3 33

    The Hoyt Alpha AX-3 33 holds and aims about as well as any bow on the market right now, which matters more on a long Panhandle sit than raw speed does. At 70 lbs it’s pushing 285 fps, plenty flat for the 20 to 40 yard shots that make up most whitetail encounters out here, and the draw cycle stays smooth enough to hold at full draw while a buck works his way down a fence line. Hoyt sells this one through authorized dealers only — check with a local pro shop or an outfitter like Lancaster Archery for current pricing.

    Best for Ground Blinds: Mathews ARC 30

    With a 30-inch axle-to-axle length, the Mathews ARC 30 is built for exactly the tight-quarters draw that a ground blind demands, without giving up speed — it’s actually one of the faster bows in this lineup at 295 fps. If most of your Panhandle hunting happens from a blind on a fence line or field edge rather than a treestand in a draw, this is the more practical bow of the two. Like the Hoyt, it’s a dealer-only bow — not something you’ll find with an Amazon listing.

    Best for Flat, Windy Ground: PSE Sicario

    When the wind is up — and on this ground, it usually is — a flatter-shooting setup buys back some of the margin a crosswind takes away. The PSE Sicario is the fastest bow in this lineup at 306 fps, generating well over 90 foot-pounds of kinetic energy, which also means plenty of authority on a big-bodied Panhandle buck at typical bow range. Same story on availability — this is a specialty-dealer bow, not an Amazon one.

    Want to Order Today? Bear Archery Royale

    If you’d rather order tonight and have a bow on your doorstep than make a pro-shop trip, the Bear Archery Royale is a legitimate option and one of the few complete hunting-ready packages actually sold on Amazon. It ships as a full ready-to-hunt package — sight, rest, quiver, and stabilizer included — with an adjustable draw weight and length that make it forgiving for a first bow or a backup setup. It won’t match the AX-3 or the ARC 30 for pure performance, but it’s real, it’s in stock, and it’ll get a beginner or a second hunter in your camp shooting a tuned setup without a dealer visit.

    Broadheads: Match the Blade to the Deer

    Panhandle whitetail run big-bodied, and a broadhead that has to punch through more muscle and a heavier shoulder needs to prioritize penetration over a huge wound channel. That’s a fixed-blade argument more than a mechanical one, though a well-built mechanical still has a place if your bow is tuned well and you’re confident in shot placement.

    • Best Fixed Blade: Iron Will S100 — A2 tool steel construction and the lowest push force of any broadhead tested by major outdoor publications this year. Built to drive through heavy shoulder muscle without losing momentum, which is exactly the problem a mature Panhandle buck presents. Iron Will sells direct and through specialty archery shops rather than Amazon.
    • Best Mechanical: Rage Hypodermic NC — A hybrid tip that punches through bone like a chisel while the leading edge cuts on contact, deploying to a 2-inch cutting diameter on impact. One of the most proven mechanicals on the market, and a strong choice if your setup is well tuned and you’re taking broadside or quartering-away shots rather than punching through a shoulder.
    • Best Budget: Magnus Black Hornet — Around $40 and still produces a wound channel close to two inches. A legitimate option if you’re outfitting more than one bow or don’t want to spend premium money to find out what shoots best from your setup. Sold through archery specialty retailers rather than Amazon.

    Tuning Compound Bows and Broadheads Before the Season

    No broadhead fixes a bow that isn’t tuned. Shoot your broadheads — not just field points — from actual hunting distance before the season, and watch for any lateral drift compared to your field-point groups. A fixed blade will expose a tuning problem that a field point hides completely, and finding that out in your backyard beats finding it out on a blood trail. Once you’re confident in the setup, the rest of your kit — rangefinder, optics, boots — is worth checking against the full Recommended Gear list before archery season opens on the Panhandle whitetail ground you hunt.

  • How to Field Dress a Whitetail Deer: Step-by-Step

    How to Field Dress a Whitetail Deer: Step-by-Step

    Early archery season on the Panhandle means one thing a lot of new hunters don’t plan for: heat. A deer down at 7pm in September can spoil fast if the meat doesn’t start cooling within the hour, and that clock starts the second the arrow hits, not when you get around to it. Field dressing isn’t the hard part of deer hunting — it’s just a part nobody explains clearly the first time. Here’s how to field dress a deer, start to finish.

    The gear you need to field dress a deer: a fixed-blade hunting knife, gloves, and a game bag laid out on a truck tailgate.
    The basics worth having in the truck before opening morning: a sharp fixed-blade knife, a pair of gloves, and game bags.

    Before You Make a Cut

    Get gloves on before you touch anything — field dressing is where hunters most often end up with a cut or a case of something they didn’t need to catch. Tag the deer per Texas Parks and Wildlife requirements first. Then roll the deer onto its back and, if you’ve got help, prop the hindquarters up slightly with a rock or a pack; gravity does some of the work for you once the cavity opens.

    You need a sharp knife — a guthook on the blade is worth having for this specific job, since it lets you open the skin without driving the point in deep. A CRKT Soldotna is a solid, purpose-built choice: a shorter blade you can control precisely instead of a long fixed blade that’s easy to plunge too deep.

    Opening the Cavity

    1. On a buck, remove the testicles first. On a doe, your starting point is just forward of the udder.
    2. Pinch the skin and make a small entry cut, then turn your blade edge-up and run it toward the sternum, guiding with two fingers ahead of the blade so you’re cutting skin and thin muscle only. Go shallow. A deep cut here punctures the stomach or intestines and turns a clean job into a genuinely unpleasant one.
    3. Widen the opening enough to work both hands into the cavity.

    Clearing the Cavity

    1. Reach in and pull the stomach and intestines down and out of the lower cavity, keeping the large intestine intact as you go — a puncture here is what actually ruins meat, more than anything else in this process.
    2. Find the diaphragm, the thin sheet of muscle separating the chest cavity from the lower cavity, and cut it free along the inside of the ribs on both sides.
    3. Reach up into the chest cavity, sever the esophagus and windpipe as high as you can reach, and pull the heart and lungs out as one unit.

    Finishing the Job

    1. Split the pelvis if you want the bladder and remaining lower intestine out cleanly — a small saw or a good pair of shears makes this a ten-second job instead of a fight with a knife blade.
    2. Carefully cut around and remove the bladder, keeping it upright so it doesn’t spill on the meat.
    3. Roll the deer to drain remaining blood, and wipe the cavity out with a clean cloth or dry grass rather than water if you’re not near clean water — you want the cavity dry, not rinsed with anything questionable.

    Getting Ahead of Panhandle Heat

    This is the step that matters more here than in cooler country. Once the cavity is open and cleared, prop it open with a stick to let air move through, and get the deer into shade if there’s any to be had — a cedar draw or a north-facing cut works if you can drag or quarter the deer to reach one. If temperatures are still in the 70s or 80s, which is common during the Panhandle archery opener, don’t wait on a full retrieval with a truck. Quartering the deer in the field and getting the meat into game bags and a cooler beats leaving a whole carcass hanging in the heat while you figure out logistics.

    What Comes Next

    Field dressing only buys the meat time — it doesn’t finish the job. Get the deer skinned and into a cooler or a walk-in as soon as you reasonably can, and don’t let a good shot on a good buck go to waste over a few hours of avoidable heat. The next step — breaking the animal down along the seams, without ever putting a saw to bone — is covered start to finish in how to butcher a deer at home.

    How to Field Dress a Deer: Shopping Guide

    If your kit isn’t built out yet, here’s everything covered above in one place — the gear worth having in the truck before you need it, not after.

    • Gloves — shoulder-length gutting gloves keep blood and bacteria off your hands, and off any small cut you don’t know you have yet. These are latex rather than nitrile, worth knowing if anyone in your truck has an allergy.
    • Knife — a CRKT Soldotna or something similar with a guthook handles the cuts described above without much risk of going too deep.
    • Saw or shears — a dedicated pair of hunting shears splits the pelvis in seconds instead of turning it into a fight with a knife blade.
    • Game bags — breathable game bags keep quartered meat clean and let it cool, instead of trapping heat against cooler plastic.
    • Cooler — something built to actually hold ice, like an RTIC 52 QT Ultra-Light, is what gets quartered meat through a hot Panhandle afternoon.
    • Rags or wipes — heavy-duty hand and tool wipes clean up hands, knife, and gear without needing water you can’t vouch for.
    • Headlamp — a lot of field dressing happens before sunrise or after dark. A rechargeable headlamp keeps both hands free when you need them most.
  • How to Pattern a Panhandle Whitetail Before Archery Season

    How to Pattern a Panhandle Whitetail Before Archery Season

    Most bowhunters lose their season in September, not October — they just don’t find out until opening day. A Panhandle whitetail’s movement shifts hard in the weeks before archery season opens, as bucks drop their summer feeding routines and start easing toward the cover they’ll use once pressure hits. If you’re still hunting off a trail-cam pattern from July, you’re already behind. Here’s how to pattern whitetail deer on the Panhandle before the season starts, not after.

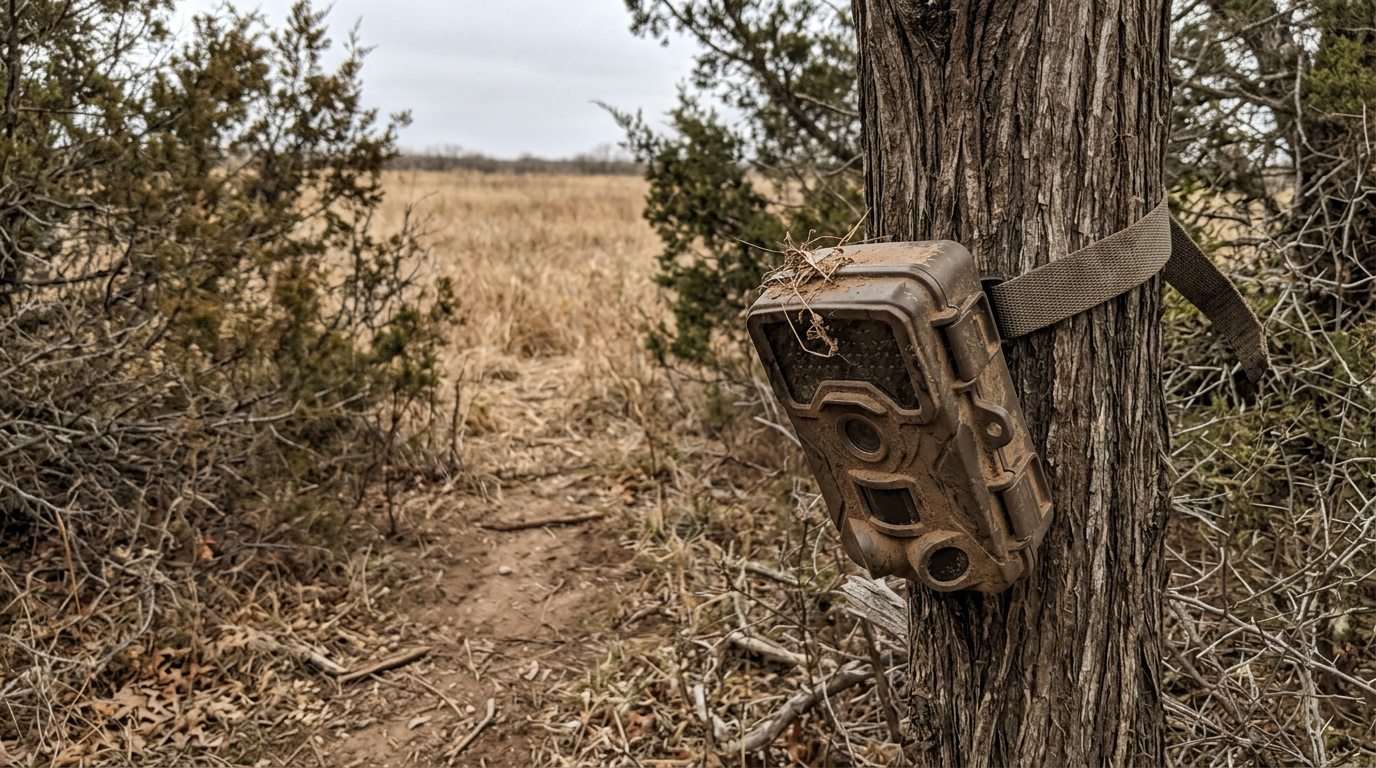
    A trail camera strapped to a cedar tree, angled down over a narrow game trail where a brushy draw funnels into a wheat field edge — used to pattern whitetail deer before archery season.
    A trail camera set on the funnel itself, not out on the field edge — confirming what’s actually using the terrain before opening day.

    Why the Summer Pattern Breaks Down

    All summer, bucks run in loose bachelor groups and key on the easiest calories around — ag fields, food plots, whatever’s green. That pattern holds until velvet starts peeling in late August and early September. Once it does, bachelor groups break up, testosterone climbs, and bucks start favoring security cover over open feed. The deer you’ve been watching on a wheat field edge all summer can disappear into a cedar draw almost overnight, and a trail-cam card full of July photos tells you nothing about where he’ll be in three weeks.

    Shortening daylight matters here too. As days get shorter heading into September, deer shift more of their movement toward dawn and dusk and tighten up their core area. A buck that ranged widely across open whitetail country in June often settles into a much smaller piece of ground by the time archery season opens — usually built around a specific draw, a cedar pocket, or a bend in a fence line he can move through without crossing open ground.

    Read the Terrain First, Cameras Second

    On this ground, the terrain tells you more than a camera card ever will. Look for the pinch points: places where a cedar or mesquite draw narrows against a wheat or milo field, or where two cuts come together before opening into ag ground. Deer use these funnels because they offer cover most of the way to the food, and they’re the same funnels that hold up year after year regardless of what any individual buck is doing that season.

    Staging areas matter as much as the funnels themselves. Look thirty to eighty yards back into cover from a field edge for the beat-down ground, rubs, and early scrapes where bucks wait for last light before committing to open feed. That staging cover is where an evening bow hunt actually happens — not out on the field edge itself, where a mature buck won’t show until it’s nearly too dark to shoot.

    Using Trail Cameras to Pattern Whitetail Deer Without Guessing

    Once you’ve picked funnels and staging areas off the terrain, cameras earn their keep confirming what’s actually using them. Hang cameras on the funnel itself rather than out on the field, and check them as infrequently as you can stand to — every trip in is a chance to leave scent and educate the exact deer you’re trying to pattern. A cellular unit like the Moultrie Edge 4 Solar solves this problem outright — it sends photos to your phone so you never have to walk in and check a card, which on this ground is the difference between a spot staying fresh through opening week and getting blown out before archery season even starts.

    Setting Your Stand Without Burning the Spot

    Hang your stand or set your blind as close to opening day as you reasonably can, and always with the wind in mind on the walk in as much as the sit itself. A staging area that’s held deer all September can go quiet in two days if your entry route pushes scent across the same cover the deer are using to approach it. Cut a low-impact entry path that keeps you downwind of the funnel, not just downwind of where you expect the shot.

    Stay Willing to Move

    A pattern built in late August is a working theory, not a guarantee. Bucks keep adjusting right up through the opener, and a hot week or an early cold front can shift movement again before you ever draw your bow. Treat your first sit as more information, not a final answer — if the deer aren’t moving where the sign said they would, trust what you saw with your own eyes over what the trail-cam pattern predicted, and be ready to shift a hundred yards down the same draw rather than starting over completely.

  • Best Rangefinders for West Texas Whitetail and Mule Deer

    Best Rangefinders for West Texas Whitetail and Mule Deer

    West Texas doesn’t do anything halfway, and that includes the distances. A shot that looks like 200 yards across a wheat field can run past 300 once you actually range it, and guessing wrong in Palo Duro Canyon costs more hunters their tag than bad shooting ever does. A good rangefinder isn’t optional gear out here — it’s the difference between a clean shot and a long walk home with nothing to show for it. Here’s what actually holds up in Panhandle conditions, and what to look for if you’re buying your first one. Whether you’re after whitetail in the wheat or picking the best rangefinder for mule deer across open canyon country, the same core features matter.

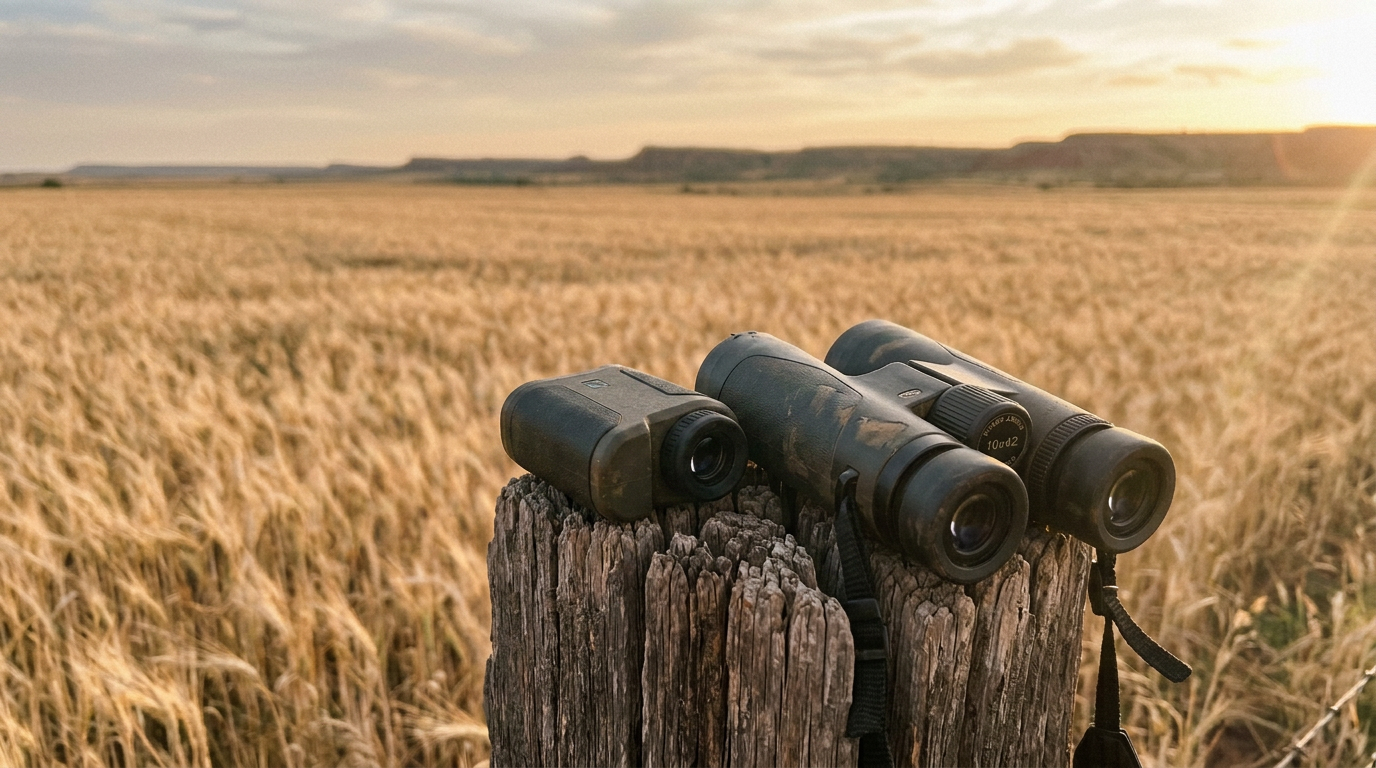
    A compact laser rangefinder and a pair of binoculars resting on a weathered fence post at the edge of a West Texas wheat field at golden hour.
    Rangefinder and binoculars staged on a fence post at the edge of a wheat field — the kind of glassing setup that matters most on long West Texas shots.

    What Actually Matters Out Here

    Most rangefinder marketing leans on max range, and that number is close to useless on its own. A unit that claims 2,000 yards on a reflective road sign might only read a deer-sized target at 600. What matters for whitetail and mule deer hunting on this ground is the deer-specific range, angle compensation, and how fast the unit reads in real conditions — wind moving the brush, low morning light, gloved hands.

    Angle compensation is the one you can’t skip. Canyon rims, cedar breaks, and the folds along the Canadian River put you shooting up or down more often than level, and a steep angle shrinks the actual distance the bullet has to travel. A rangefinder that gives you true horizontal distance does that math for you instantly. One that doesn’t leaves you holding over a target you’ve already overestimated.

    Best Overall: Leupold RX-5000 TBR/W

    The Leupold RX-5000 TBR/W reads to 5,000 yards on reflective targets and comfortably out past the ranges most Panhandle shots actually happen at, with Leupold’s True Ballistic Range/Wind system doing the angle and wind-hold math for you. It’s the same TBR/W technology that’s been the standard pick on our full gear list for years, updated with a longer read distance and a cleaner display. Simple two-button operation, and it still works with a glove on, which matters more than people think once that first cold front rolls through in November.

    Best Budget: Leupold RX-1400i TBR/W Gen 2

    If this is your first rangefinder, or you’re outfitting a kid for a youth hunt, the Leupold RX-1400i TBR/W Gen 2 covers real deer-hunting distance — around 950 yards on a deer-sized target — with the same angle-compensating TBR/W math as the more expensive units. Most whitetail shots on this ground run 150 to 300 yards anyway. This unit ranges well past that without paying for capability you won’t use.

    Best Rangefinder for Mule Deer: Vortex Razor HD 4000 GB

    Mule deer hunting on the canyon rims and wind-scoured mesas is a different game than sitting a whitetail draw, and it’s where the best rangefinder for mule deer country earns its keep. You’re often ranging a buck the moment you spot him, across a canyon, before he ever knows you’re there. The Vortex Razor HD 4000 GB reads out to roughly 2,200 yards on a deer-sized target and runs Vortex’s ballistics solver, which is the extra headroom that big, open canyon country calls for. It’s also simply the best glass of the three — worth it if you spend more time glassing than shooting.

    Whitetail vs. Mule Deer: Different Ranging Problems

    A whitetail hunter posted up in a finger draw off the wheat is usually ranging known landmarks ahead of time — that fence post, that cedar, that break in the CRP — so the shot is already anticipated before a deer shows up. A mule deer hunter glassing canyon rims is doing the opposite: spotting a buck first, then ranging him cold, often at a steeper angle and a longer distance than a whitetail hunter ever deals with. If you hunt both, buy for the mule deer distances. It’s easy to range a close whitetail with a long-range unit; it’s impossible to range a far mule deer with a short one.

    Before the Season Starts

    Range known distances around your stand or blind before opening day, not during the moment of truth. Walk off or map the yardage to the fence post, the tank dam, the edge of the milo, then check your rangefinder against it. That five minutes of homework is what turns a rangefinder from a number on a screen into a number you trust when a good buck steps out and your hands aren’t quite steady. Check the full Recommended Gear list for the rest of the optics kit that pairs with it.